Getting Used To The Panel
This section helps users understand how to navigate and efficiently operate the platform interface.
6.1 Level 0 (Primary ERP – Pinnacle Only):
This level provides access to core system controls available exclusively to Pinnacle users.
6.1.1 Login Page
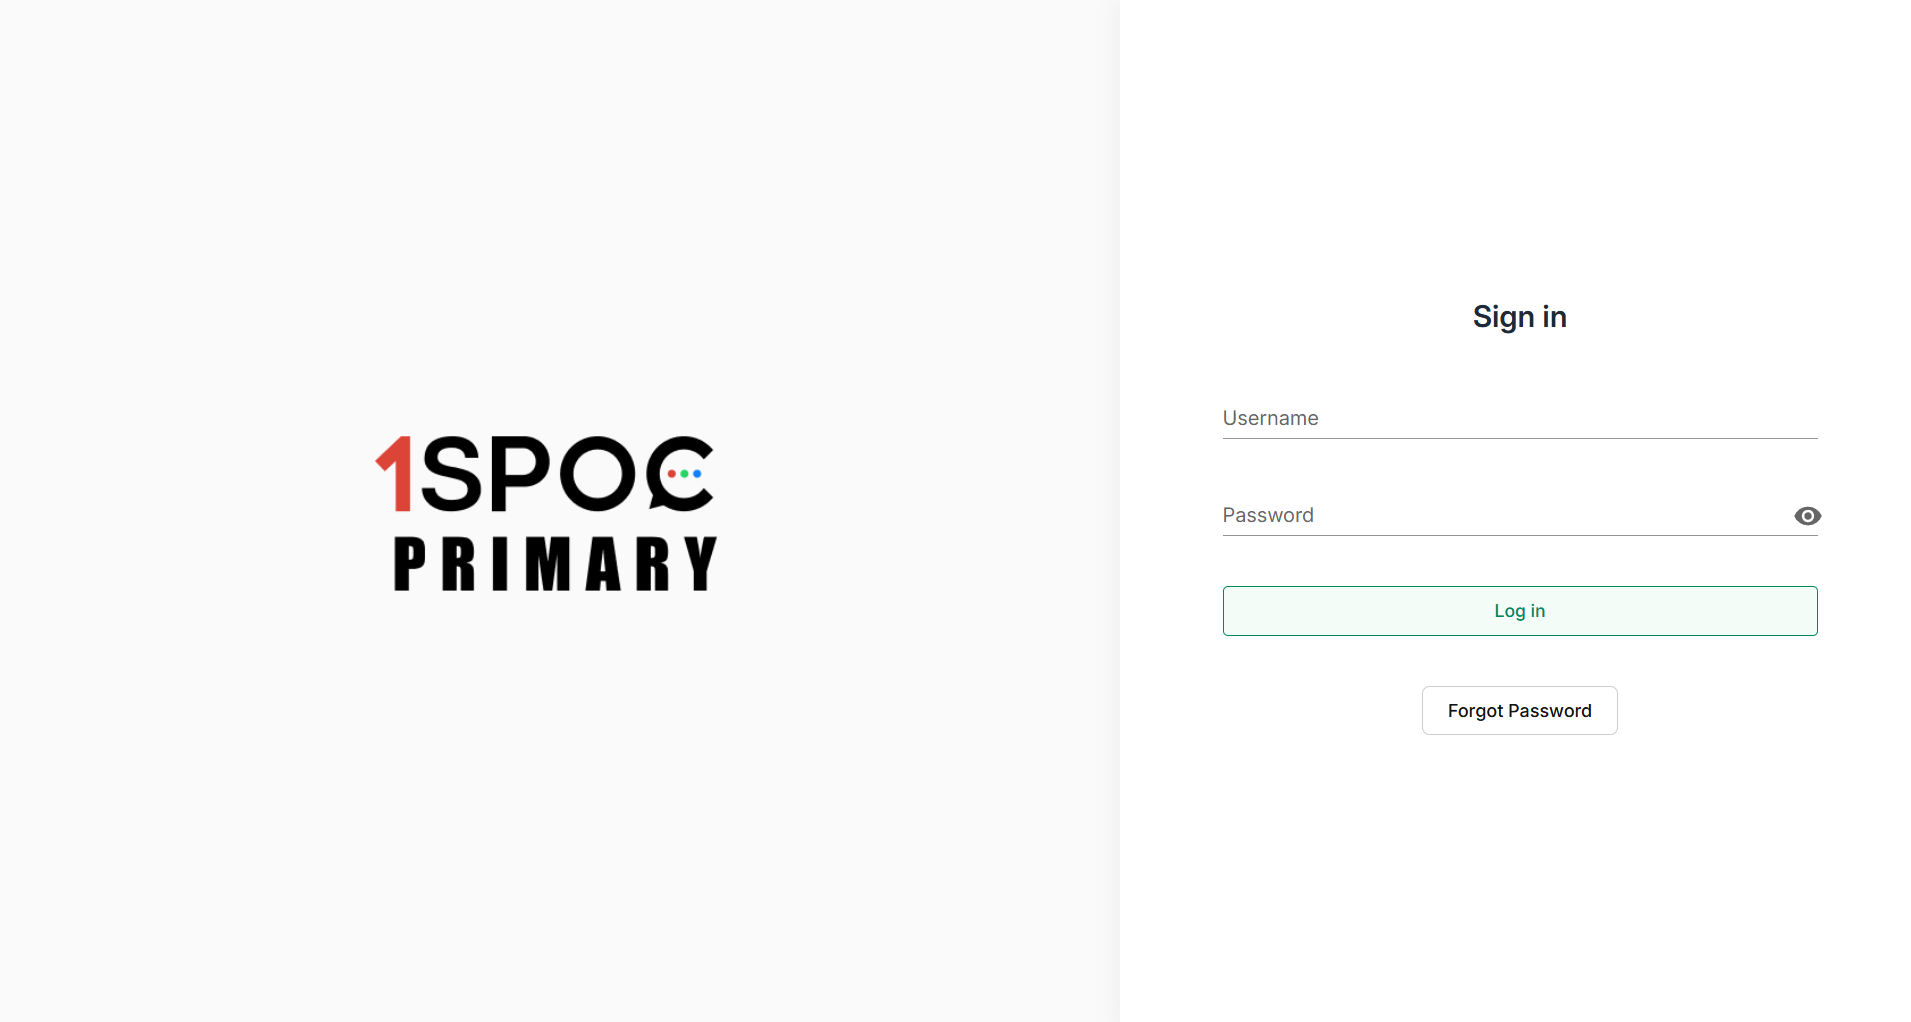
The login page serves as the entry point, allowing authorized users to securely access the panel.
Users can sign in using their registered email ID and password to access the platform. The page also provides an option to reset the password using the “Forgot Password” link in case users are unable to log in.
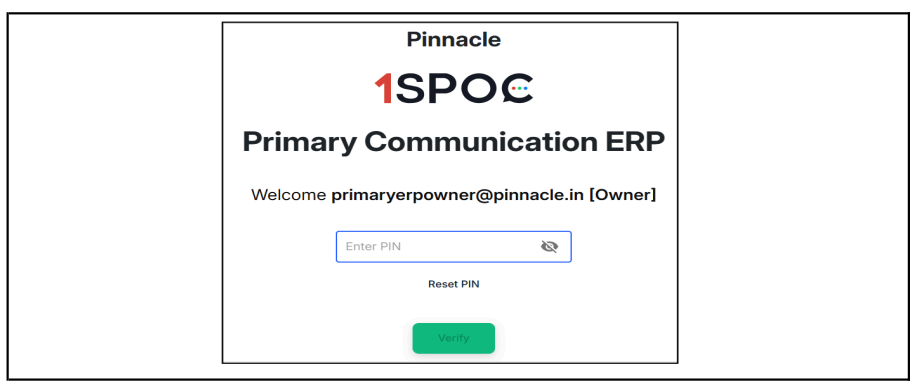
Once logged in, the user has to provide a PIN as a 2FA to be able to see the panel.
6.1.2 SOURCES
The Sources module allows users to view and manage all the communication channels integrated within the ERP.
These sources act as entry points for campaign creation, message routing, and channel configuration.
Key Components
6.1.2.1 Left Navigation Panel
The sidebar provides quick access to essential modules within the system. Each option enables users to efficiently navigate and manage related configurations.
Modules Available:
➔ Sources: Manage all available communication channels.
➔ Companies: View, add, or modify company details.
➔ Providers: Manage communication service providers.
➔ My Billing Units: Configure billing and rate management units.
➔ My Users: Manage user roles, permissions, and access levels.
➔ Secondary ERPs: Link and manage connected ERP systems.
➔ Sales: Access sales-related configurations, reports, and analytics.
6.1.2.2. Main Section – Sources Overview
This section provides a consolidated view of all communication channels integrated within the system. Each channel is represented as a card that includes configuration and management options.
Available Sources:
➔ SMS
➔ RCS (Rich Communication Services)
➔ Bot
➔ Process
➔ Live Agent
➔ Ads Manager
Each Source Card Includes:
➔ A “Sources” button for:
◆ Viewing existing configurations
◆ Adding or editing integration details
◆ Managing credentials or API connections specific to that source
Purpose: The Sources Overview acts as a centralized dashboard for managing all messaging and marketing channels integrated into the 1SPOC platform. It allows users to monitor, configure, and maintain multiple communication sources from a single interface.
6.1.2.3. WhatsApp Source Management
This page lists all existing WhatsApp sources configured within the system. Each source represents a connected WhatsApp Business Account used for sending and receiving messages or executing campaigns through the platform.

Key Elements:
➔ Source Column: Displays the name of each configured WhatsApp source.
➔ Rates Column: Displays or allows editing of rate details associated with that particular source.
➔ New Source Button (“+ New Source”):
◆ Located at the top-right corner of the page.
◆ Allows users to add a new WhatsApp source.
◆ Opens a setup form where users can: Enter source details (e.g., Source Name)
◆ Save and activate the new source for campaign use
Purpose: This section enables administrators and users to view, manage, or add WhatsApp sources integrated with the 1SPOC ERP platform, ensuring seamless communication and campaign management through the WhatsApp channel.
NOTE: The same functionality applies to all other communication channels: SMS, RCS, Bot, Process, Live Agent, and Ads Manager. Each channel page allows users to:
➔ View existing integrations
➔ Add new sources using the “+ New Source” button and edit or update channel-specific configurations
6.1.3 COMPANIES
The Companies module allows users to view, add, and manage all companies registered within the 1SPOC platform.
Each company record typically represents a business entity that uses or manages communication services through the platform.
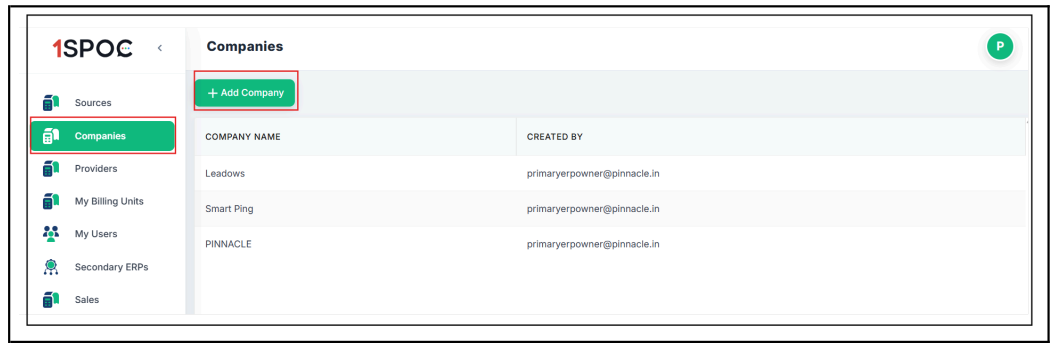
6.1.3.1 Main Screen – Companies List
The Companies tab in the left navigation panel displays a list of all existing companies added to the system.
Displayed Details Include:
➔ Company Name: The registered name of the business entity.
➔ Created By: The email address of the user who added the company.
Actions Available:
➔ To add a new company, click the “+ Add Company” button located at the top-right corner of the screen.
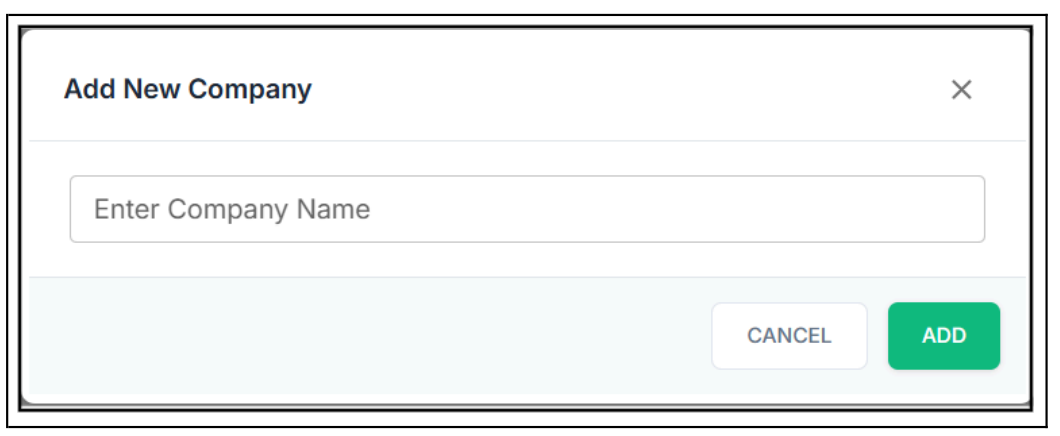
Add New Company Popup
When the “+ Add Company” button is clicked:
➔ A dialog box titled “Add New Company” appears.
➔ Enter the Company Name in the input field provided.
➔ Click Add to save the company details.
➔ Click Cancel to exit without saving changes.
Purpose: This module enables administrators to efficiently create, manage, and track company-level accounts that operate within the 1SPOC platform.
Each company added here can later be linked to related modules, such as:
➔ Sources (communication channels)
➔ Billing Units
➔ Users
This ensures streamlined organization and management of business entities within the system.
6.1.4 PROVIDERS
The Providers module allows users to manage communication service providers integrated with various channels such as WhatsApp, SMS, RCS, Bot, Process, Live Agent, and Ads Manager.
Each provider represents a third-party or in-house service used to facilitate messaging and communication across these channels.
6.1.4.1 Accessing Providers
To access the Providers section:
➔ Navigate to Providers from the left sidebar menu.
➔ Select the desired communication channel (e.g., WhatsApp, SMS).
➔ Click the Providers button to view the list of configured service providers
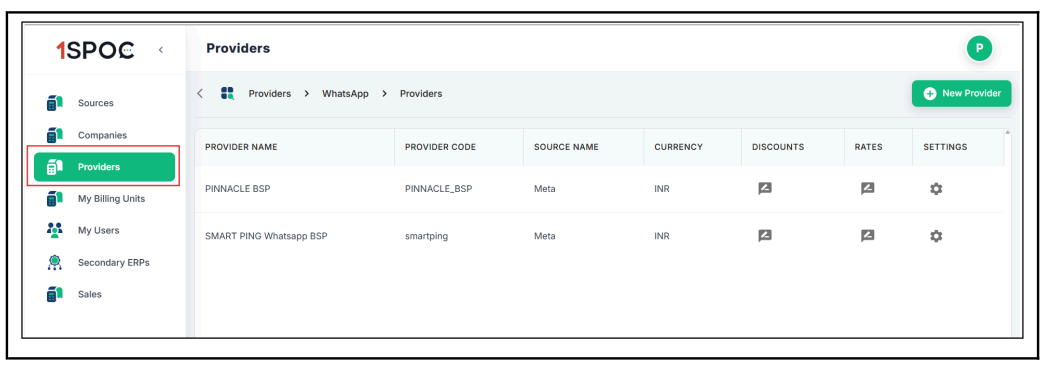
The Provider List displays all existing providers associated with the selected communication channel.
Displayed Details Include:
➔ Provider Name: The name of the service provider.
➔ Provider Code: A unique identifier assigned to the provider.
➔ Source Name: The associated communication source (e.g., Meta for WhatsApp).
➔ Currency: The currency used for billing or rate configuration (e.g., INR).
➔ Discounts: Edit or update discount settings (represented by the pencil icon).
➔ Rates: Configure pricing rates for the selected provider (pencil icon).
➔ Settings: Access detailed provider settings (gear icon).
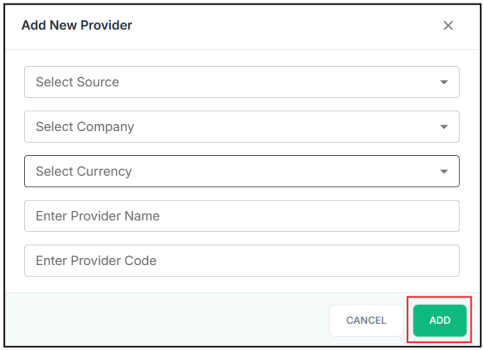
6.1.4.3 Adding a New Provider
To add a new provider:
➔ Click the “+ New Provider” button located at the top-right corner of the page.
➔ Fill in the required fields:
◆ Select Source: Choose the communication source (e.g., WhatsApp, SMS).
◆ Select Company: Choose the company associated with the provider.
➔ Select Currency: Choose the billing currency.
◆ Enter Provider Name: Specify the provider’s name.
◆ Enter Provider Code: Assign a unique code for identification.
➔ Click ADD to save the new provider or CANCEL to discard changes.
Purpose: The Providers section enables centralized management of all communication service providers across different channels.
It ensures that each source and company is properly linked to its respective provider, allowing for efficient configuration, rate management, and performance tracking within the 1SPOC platform.
6.1.5 MY BILLING UNITS
The My Billing Units module allows users to manage, monitor, and configure billing units within their organization.
Billing units are used to track usage, costs, and allocations across different communication services and sources integrated into the 1SPOC platform.

6.1.5.1 Dashboard Metrics
At the top of the screen, three key metrics provide a quick summary of billing unit status and activity:
➔ Total Units: Displays the total number of billing units configured in the system.
➔ Active Units: Shows the count of billing units that are currently active and operational.
➔ Inactive Units: Displays the number of billing units that are disabled or not in use.
These metrics provide an instant overview of your organization’s billing structure and operational status.
6.1.5.2 Billing Unit Card
Each billing unit appears as an individual card containing essential information and management options.
Details Displayed on Each Card:
➔ Unit Name: The name assigned to the billing unit (e.g., Default).
➔ Status Badge: A green “Active” indicator shows that the unit is operational.
➔ Default Badge: A yellow “Default” tag marks it as the primary billing unit.
➔ Secondary ERPs Button: Provides access to linked Secondary ERP systems associated with this billing unit.
Key Features
➔ Quick Status Overview: Instantly view the operational status of all billing units at a glance.
➔ ERP Integration: Connect and manage Secondary ERP systems directly through the “Secondary ERPs” button.
➔ Unit Management: Monitor which billing units are active and being utilized for cost tracking and reporting.
Purpose: The My Billing Units section serves as a centralized control panel for managing all billing configurations within the platform.
It enables administrators to:
➔ Ensure accurate cost allocation across services and sources,
➔ Maintain organized billing records, and
➔ Seamlessly integrate with ERP systems for financial tracking and reporting.
6.1.6 MY USERS
The My Users module enables administrators to manage user accounts, roles, and access permissions within the 1SPOC platform.
This section helps maintain secure and organized user management across the organization.
6.1.6.1 Adding New Users
To create a new user account:
➔ Click the “+ New User” button located at the top-right corner of the page.
➔ Fill in the required user details, assign an appropriate role, and save to complete the creation process.
6.1.6.2 User List Table
The user management table provides a comprehensive overview of all users added to the system.
Displayed Columns Include:
➔ USER
◆ Displays the user’s avatar (colored circle with the user’s initial).
◆ Shows the user’s display name.
◆ Displays the user’s email address.
➔ ROLE
◆ Shows the assigned role using color-coded badges:
● Owner: Full system access and ownership.
● Admin: Administrative privileges for managing settings and other users.
➔ ACTION
◆ Toggle Switch: Used to enable or disable user access.
● Green: Active user.
● Gray: Inactive user.
◆ Owner accounts typically do not include a toggle, as they have permanent access.
➔ EDIT
◆ Pencil Icon: Click to edit user details, modify roles, or update permissions.
◆ Displays “Created by: [email]” indicating which user created the account.
6.1.6.3 User Roles
➔ Owner: The primary account holder with full system control. This role cannot be deactivated.
➔ Admin: Administrative users with elevated privileges can manage configurations, other users, and overall system operations.
Key Features
➔ Quick Access: View all users at a glance through the left sidebar menu.
➔ Status Management: Instantly enable or disable user access with toggle switches.
➔ Role Assignment: Clear visual indicators for role and permission levels.
➔ Audit Trail: Track the creator of each user account for transparency.
➔ Easy Editing: Quickly modify user details, roles, or permissions via the edit icon.
Purpose: The My Users section provides a centralized and secure environment for user administration within the 1SPOC platform.
It ensures proper access control, role-based management, and system accountability, helping maintain operational efficiency and data security.
6.1.7 SECONDARY ERPs
The Secondary ERPs module enables users to integrate and manage external Enterprise Resource Planning (ERP) systems within the 1SPOC platform.
This integration ensures synchronized billing, operational, and financial data between the primary 1SPOC system and connected ERP platforms.
6.1.7.1 Adding a New Secondary ERP
To connect a new ERP system:
➔ Click the “+ Add New Secondary ERP” button located at the top-right corner of the page.
➔ Fill in the required details and configuration fields for the ERP system.
Save the configuration to establish a secure connection between 1SPOC and the external ERP.
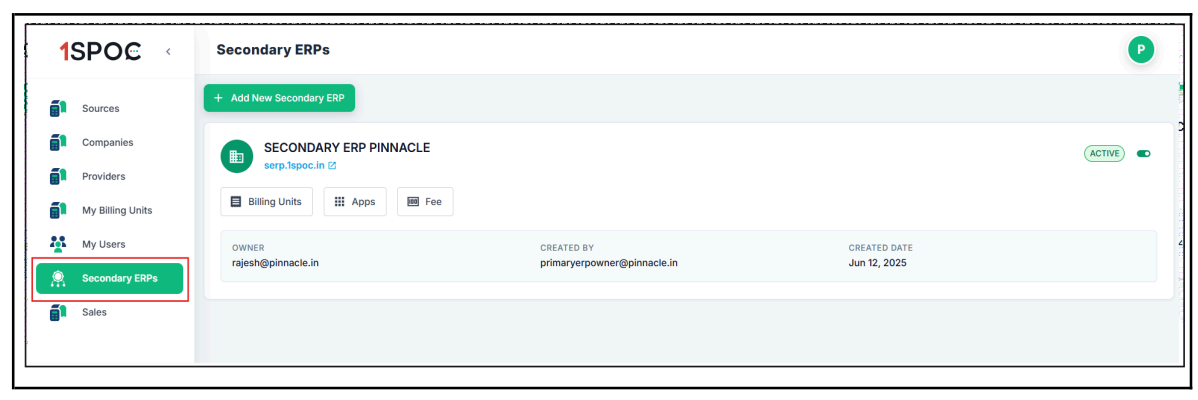
6.1.7.2 ERP Card View
Each connected ERP system is displayed as an individual card, providing a snapshot of its configuration and operational controls.
Card Components Include:
Header Information
➔ ERP Name: Displays the name of the connected ERP (e.g., SECONDARY ERP PINNACLE).
➔ Status Toggle: A green “ACTIVE” badge with a toggle switch to enable or disable the integration.
Action Buttons
Each ERP card contains three quick-access buttons for management and configuration:
➔ Billing Units: Manage billing unit configurations linked to this ERP.
➔ Apps: View and configure connected applications or integrations.
➔ Fee: Set up and manage the fee structure associated with this ERP.
Key Features
➔ Multi-ERP Support: Connect and manage multiple secondary ERP systems simultaneously.
➔ Real-time Status: Instantly enable or disable ERP integrations using the toggle switch.
➔ Direct Access: Click the ERP’s URL link to open and access the external system directly.
➔ Centralized Management: Control billing units, apps, and fees from a unified dashboard.
➔ Audit Trail: Track ownership, creation details, and changes made to each ERP integration for compliance and traceability.
Purpose: The Secondary ERPs section provides a centralized integration layer between 1SPOC and external ERP platforms.
It allows businesses to:
➔ Maintain real-time synchronization of operational and billing data,
➔ Simplify multi-ERP management, and
➔ Ensure seamless data consistency across enterprise systems.
This integration empowers organizations to maintain a unified operational ecosystem, improving efficiency and reducing manual reconciliation efforts.
6.2 Level 1: Secondary ERP ( BSP and Aggregator)
The remaining features and functionalities remain the same for the Secondary ERP as well. The options shown here are the only additional features available in this panel, offering extended control and configuration capabilities beyond the standard setup.
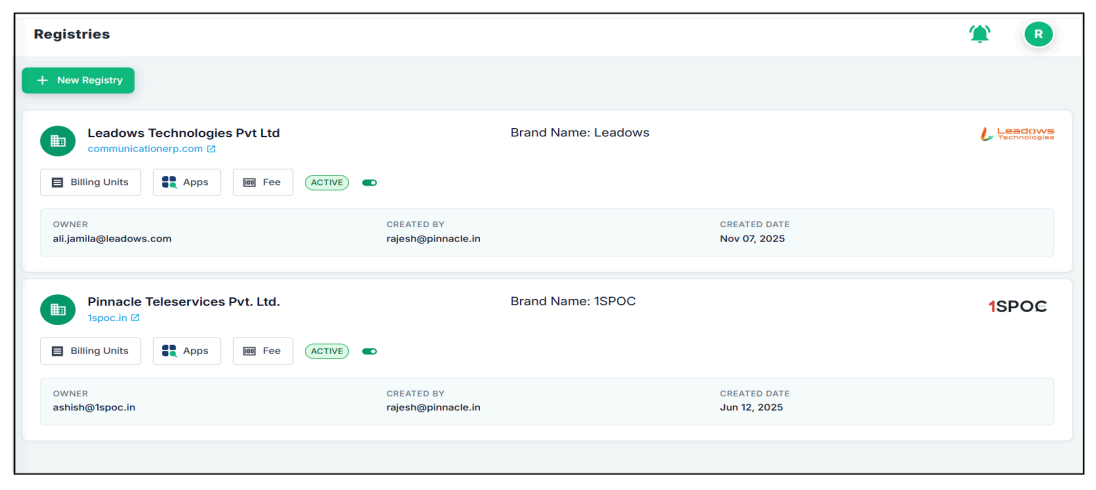
6.2.1 Registries:
➔ Shows the Registries section where all registered resellers/organizations are listed.
➔ Each registry card displays the domain, brand name, and activation status.
➔ Provides quick-access buttons for Billing Units, Apps, and Fee configuration.
➔ Shows owner details along with the creator and creation date for better traceability.
➔ Helps administrators manage and monitor multiple registries from one unified dashboard
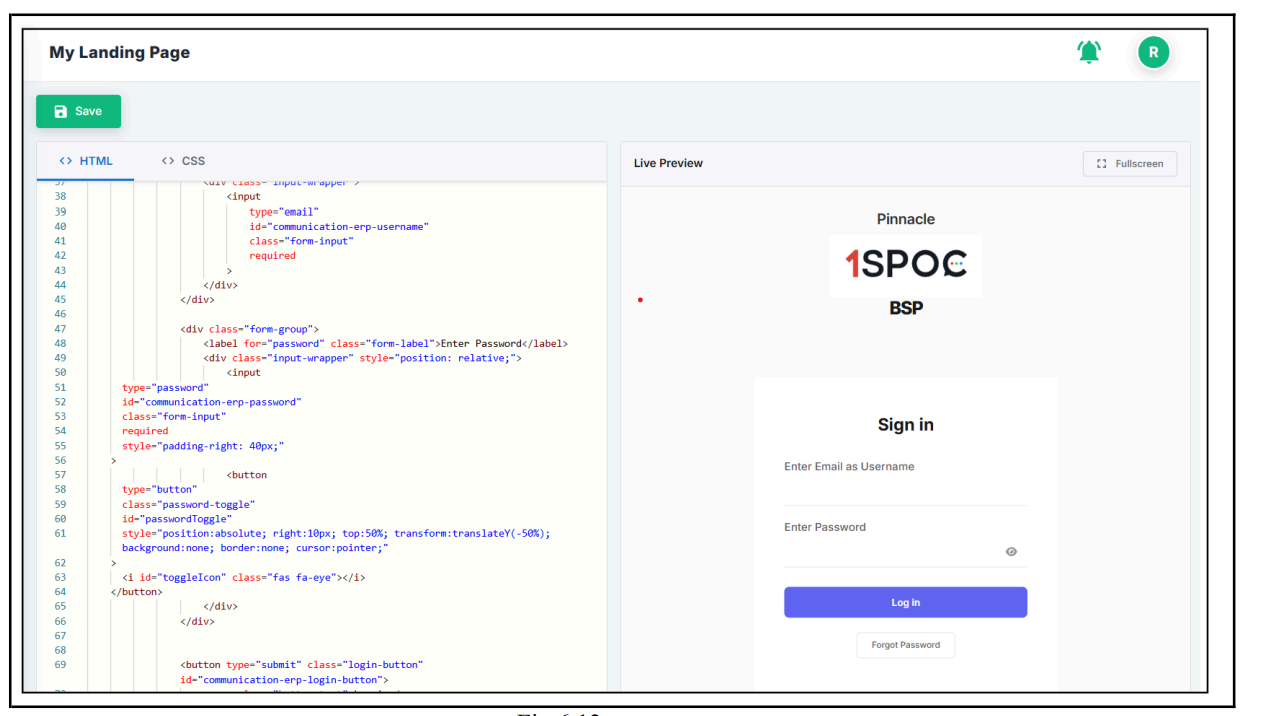
6.2.2 My Landing Page:
➔ This screen allows the user to customize their landing page using editable HTML and CSS.
➔ The left panel provides the full editable code, where users can modify layout, text, branding, and styling.
➔ The right panel shows a live preview of how the landing page will look to end users.
➔ Any changes made in the code are instantly reflected in the preview for easy visual verification.
➔ The Save button stores all customizations, enabling complete white-label control over the login experience.
6.3 Level 2: Registry
All other features and functionalities for the Registry Panel remain unchanged, similar to Level 0 and Level 1.
The options shown here represent the only additional capabilities available in this panel, providing extended control and configuration beyond the standard setup.
6.3.1 Organizations Panel
➔ New Organization Creation:- Use the New Organization button to add a new organization to the system and assign required configurations.
➔ Search & Filter:- A search bar and toggles for Active and Inactive organizations help quickly locate specific accounts.
➔ Organization Cards:- Each organization is displayed with essential information, including:
◆ Creator details
◆ Owner details
◆ Creation date and timestamp
◆ Activation status toggle
➔ Unified Management:- Administrators can manage multiple organizations in one place, ensuring consistency in configuration, billing, and application access across all accounts.
Note: User can Customize the landing page on the registry panel as well.
6.3.2 Finance Panel
1. Navigation Tabs
➔ Pending Requests
➔ Approved Requests
➔ Declined Requests
2. Available Fields
➔ Billing Unit Name
◆ Shows the name of the billing unit being requested
◆ All current entries show "Default"
➔ Requested By
◆ Shows the organization requesting approval
➔ Description
◆ Explains what the request is for
◆ All entries state: "Approval For New Billing Unit"
➔ Action
◆ Contains action buttons for each request
◆ Each row has a "Verify" button.
◆ Allows the finance team to process the request
3. User Interface Elements
➔ Profile icon
➔ Clean, organized layout for easy review
➔ Action buttons for quick processing
6.3.3 Requests (Table Structure)
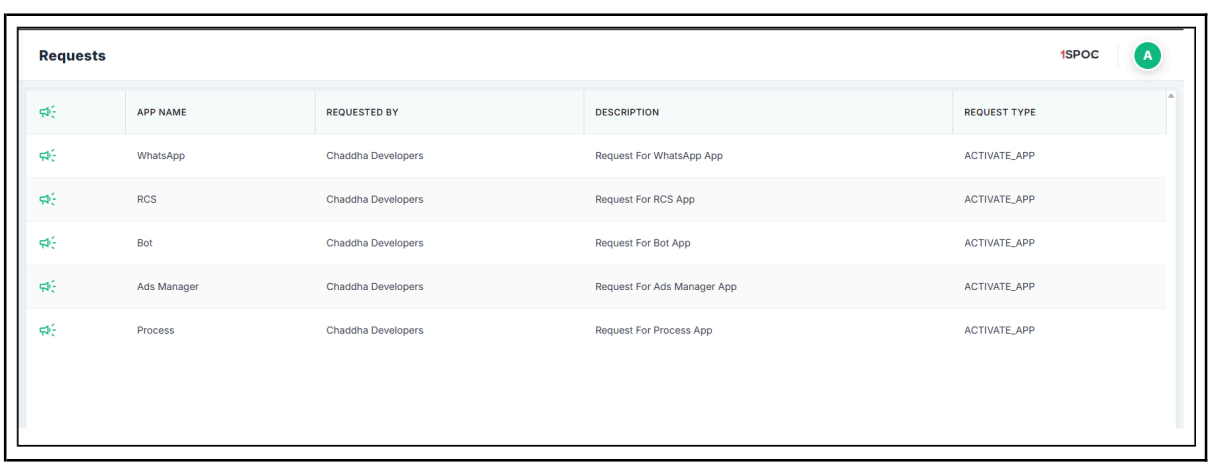
Columns (5 total):
➔ Icon Column (leftmost)
◆ Green megaphone/announcement icons
◆ Visual indicator for each request entry
➔ App Name
◆ Lists the application being requested
◆ Current apps:
● RCS
● Bot
● Ads Manager
● Process
➔ Requested By
◆ Shows who submitted the request
◆ All current requests from: Chaddha Developers
➔ Description
◆ Explains the purpose of each request
◆ Format: "Request For [App Name] App"
◆ Examples:
● Request For WhatsApp App
● Request For RCS App
● Request For Bot App
● Request For Ads Manager App
● Request For Process App
➔ Request Type
◆ Categorizes the type of request
◆ All entries show: ACTIVATE_APP
◆ Indicates these are app activation requests
Current Status
➔ Total Requests: 5 pending activation requests
➔ Requester: All from the same organization (Chaddha Developers)
➔ Action Required: Approval/processing of app activation requests
User Interface Elements
➔ Clean, tabular layout for easy scanning
➔ Profile icon in top right (green circle with "A")
➔ Company branding: "1SPOC" displayed in the header
6.4 Level 3: Organization (Owners and Users)
At this level, the Organization panel supports two types of logins: Owners, who have full control to create entities, assign heads, and manage the entire hierarchy, and Users, who have limited access and can only view the structure and details relevant to their assigned roles. This ensures clear, role-based access across the system.
At this level, the Organization panel supports two types of logins: Owners, who have full control to create entities, assign heads, and manage the entire hierarchy, and Users, who have limited access and can only view the structure and details relevant to their assigned roles. This ensures clear, role-based access across the system.
Organization-Level Dashboard
The Organization Dashboard provides a complete overview of all activities, users, and consumer units within the organization. This view is available to Owners and authorized Users based on their access rights.
Key Highlights are as follows
6.4.1 Dashboard
1. Summary Metrics
At the top of the dashboard, three primary counters are displayed:
➔ Total Users – Shows the total number of active users under the organization.
➔ Total Consumer Units – Displays all consumer units created across billing units.
➔ Total Billing Units – Shows the number of billing units associated with the organization.
2. Consumer Unit Listing
Below the summary metrics, the dashboard lists all Consumer Units grouped under their respective Billing Units. Each card includes:
➔ Consumer Unit Name
➔ Type of Service (e.g., Ads Manager, Bot, Live Agent, SMS, WhatsApp, RCS, Process)
➔ Active Users Count assigned to that consumer unit
This helps users understand how resources are structured and utilized.
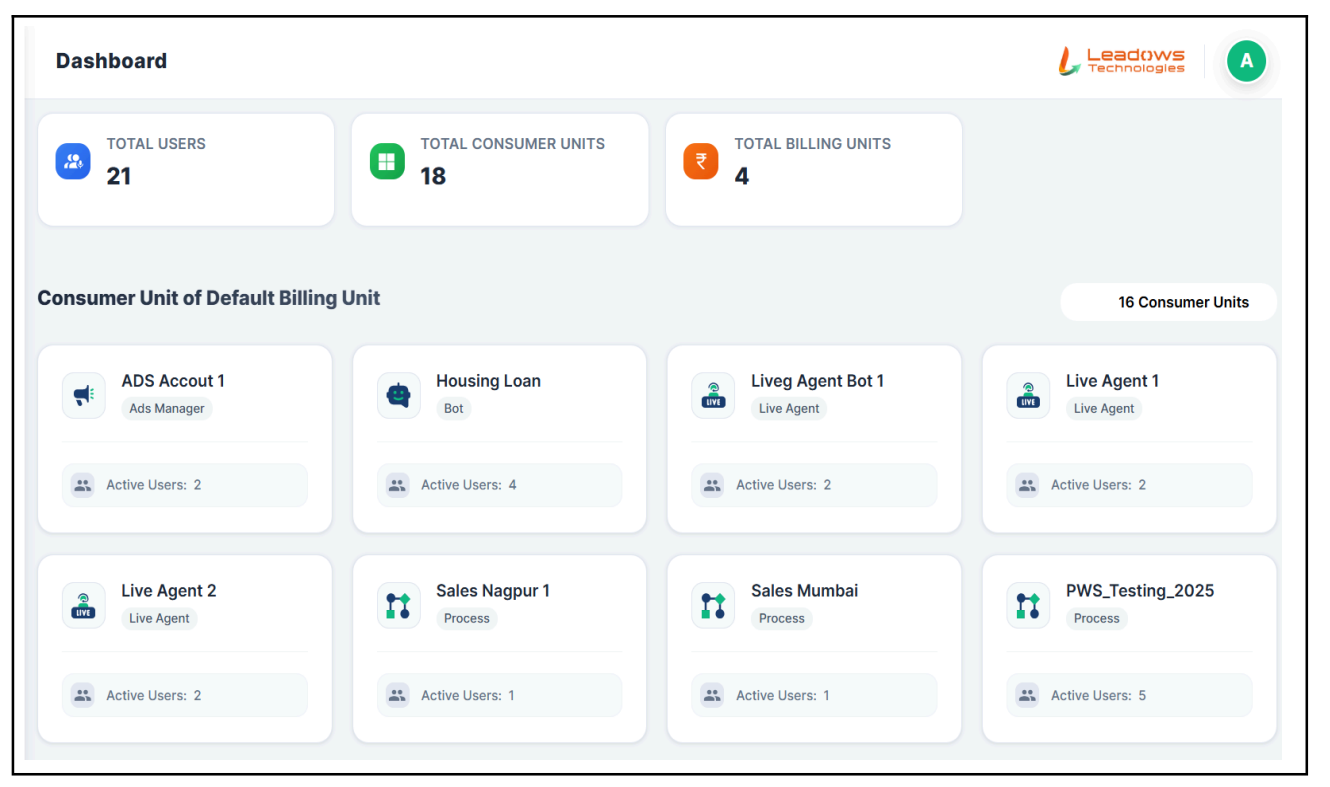
3. Billing Unit Segregation
Consumer units are displayed under separate sections, such as:
➔ Default Billing Unit
➔ India Billing Unit
➔ Nagpur Billing Unit
Each section shows the number of consumer units within that billing unit.
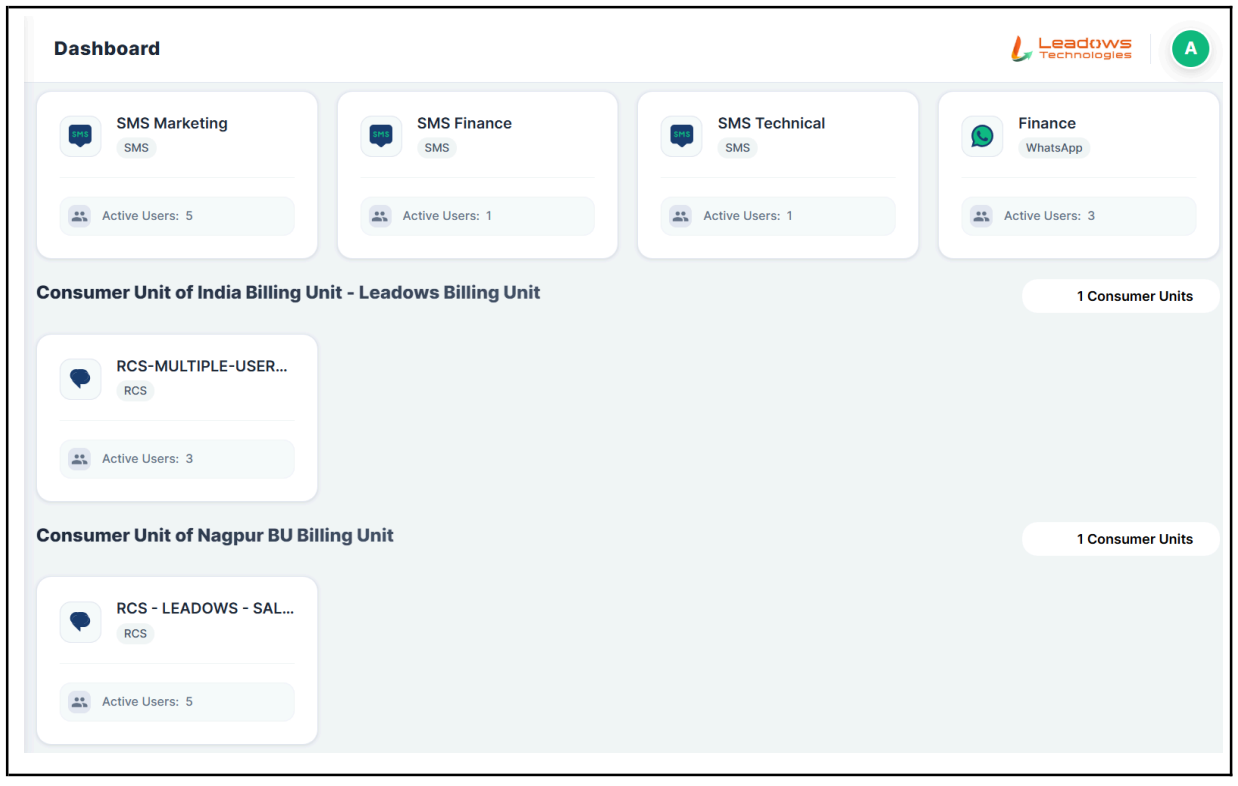
This dashboard allows organization owners and users to quickly view the hierarchy, service usage, and user distribution across all billing units, making it easier to monitor, manage, and analyze organizational activity at a glance.
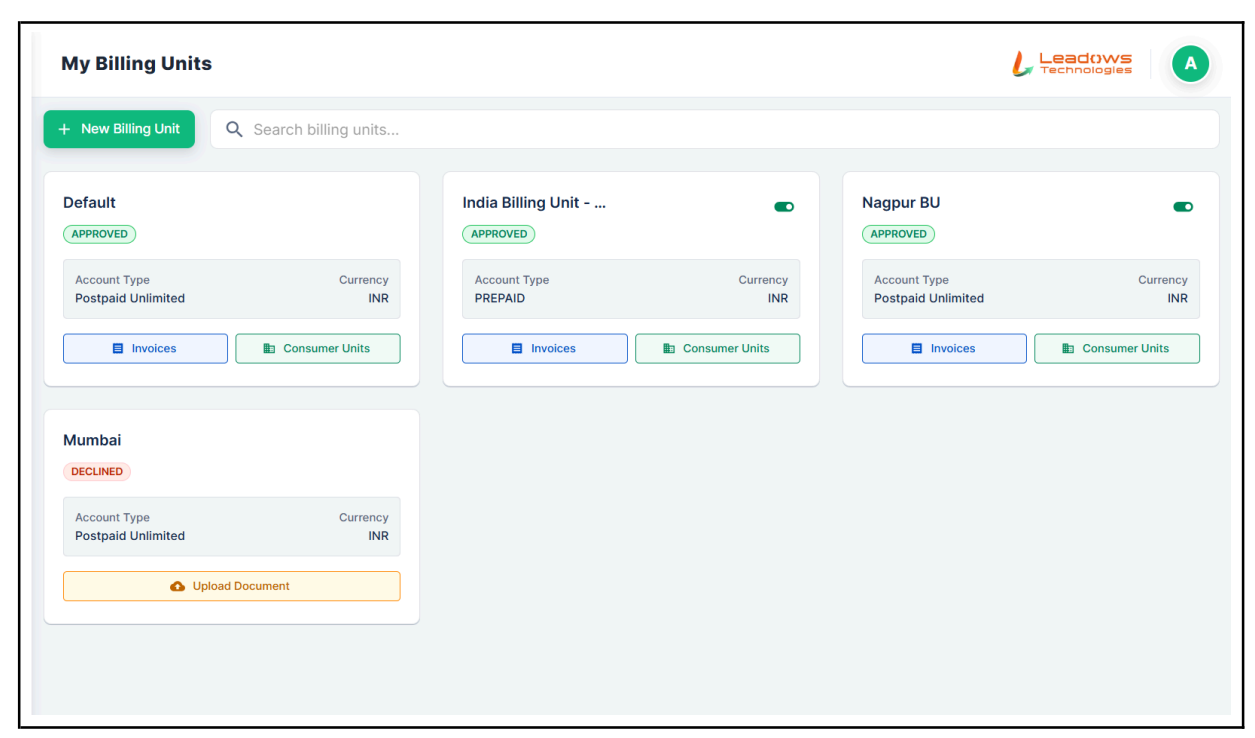
6.4.2 My Billing Unit
The Billing Unit section displays all billing units along with their approval status, account type, currency, and quick access to invoices and consumer units.
6.4.3 Communication Channels Overview
In the 1SPOC Organization Panel, Organization Owners have access to all six communication channels available within the platform. These channels provide a centralized interface to configure, monitor, and manage messaging across different mediums.
The six channels visible to the owner are: WhatsApp, SMS, RCS, Bot, Process, Live Agent
Each channel appears in the left navigation menu and can be opened to view its detailed configuration, usage reports, and operational status.
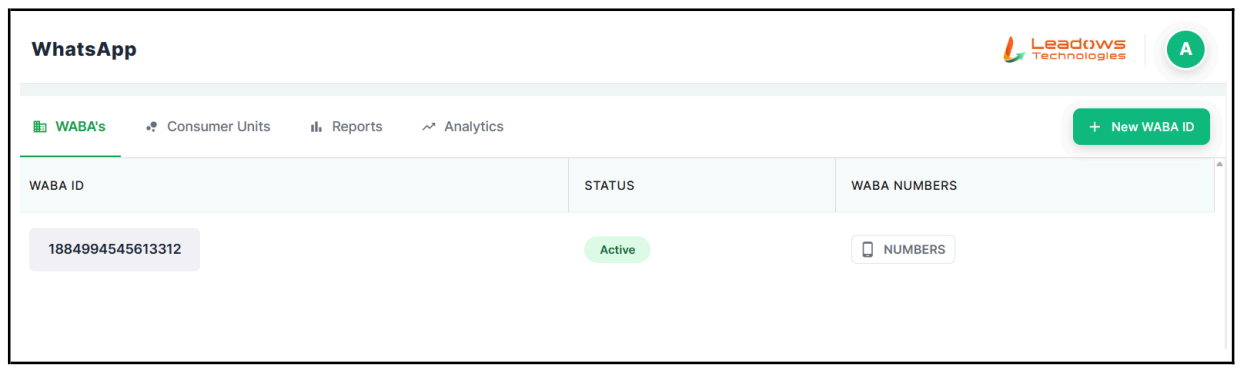
6.4.3.1 WhatsApp Dashboard Overview
The WhatsApp dashboard is divided into the following key sections:
- WABA’s (Default Tab):- This tab displays all WhatsApp Business Accounts added under your organization. Information Shown:
◆ WABA ID – The unique WhatsApp Business Account ID.
◆ Status – Indicates the current state of the account (e.g., Active).
◆ WABA Numbers – The list of phone numbers linked to the WABA.
You can click Numbers to view the phone numbers configured under the selected WABA.
➔ Consumer Units:- Displays the Consumer Units mapped to the WhatsApp channel (if applicable).
➔ Reports:- Provides access to WhatsApp usage, delivery, and template performance reports.
➔ Analytics:- Shows graphical analytics for conversation counts, templates used, and traffic patterns.
- Adding a New WABA ID:- To add a new WhatsApp Business Account:
➔ Click the + New WABA ID button on the top-right corner.
➔ A new login will appear to login in using your FB
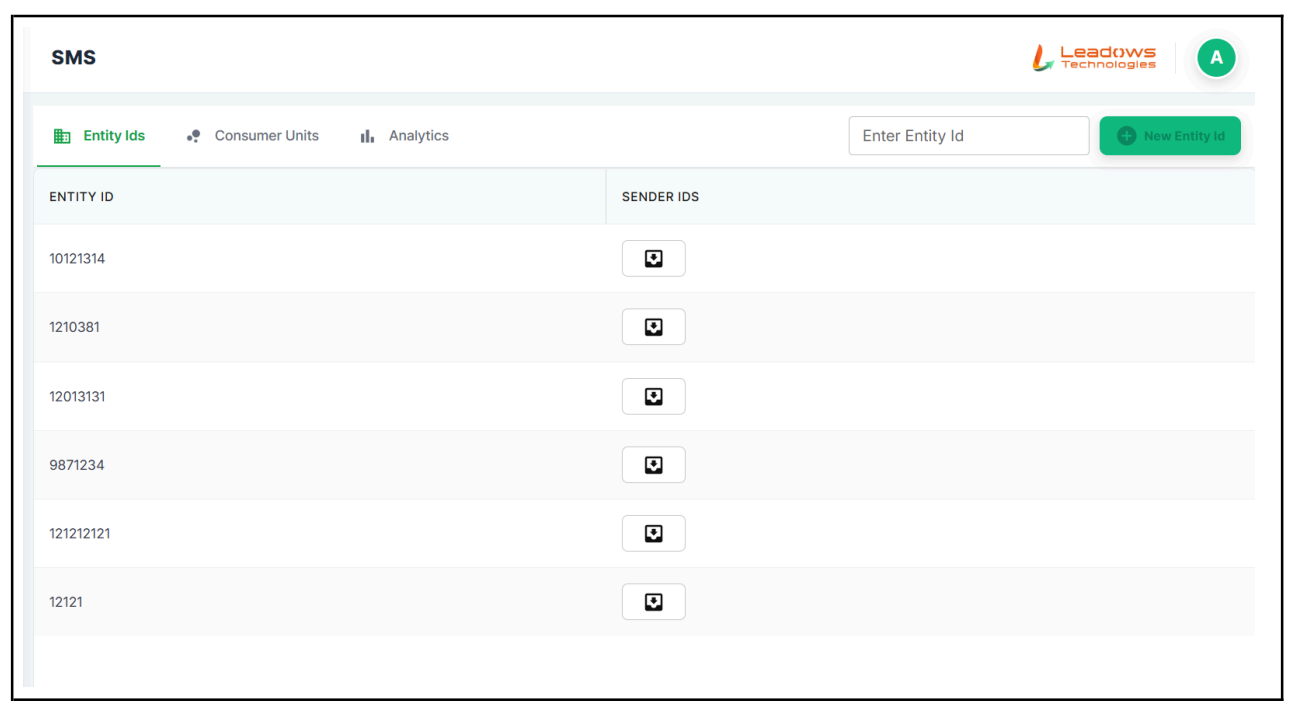
6.4.3.1.1 SMS Channel
The SMS module in the 1SPOC Organization Panel allows Organization Owners to manage SMS Entity IDs, Sender IDs, Consumer Units, and view analytics related to SMS communication.
6.4.3.1.2 RCS Channel
The RCS (Rich Communication Services) Organization Panel enables Organization Owners to manage RCS Bots, monitor their status, configure consumer units, and view reports and analytics for RCS traffic.
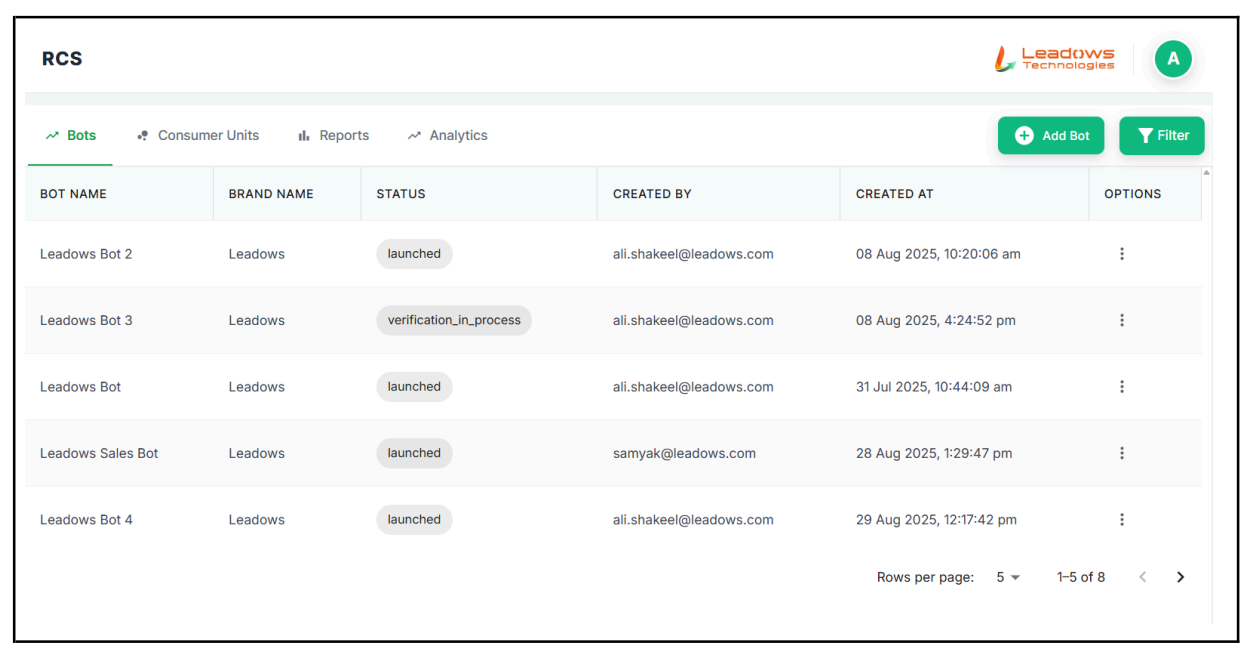
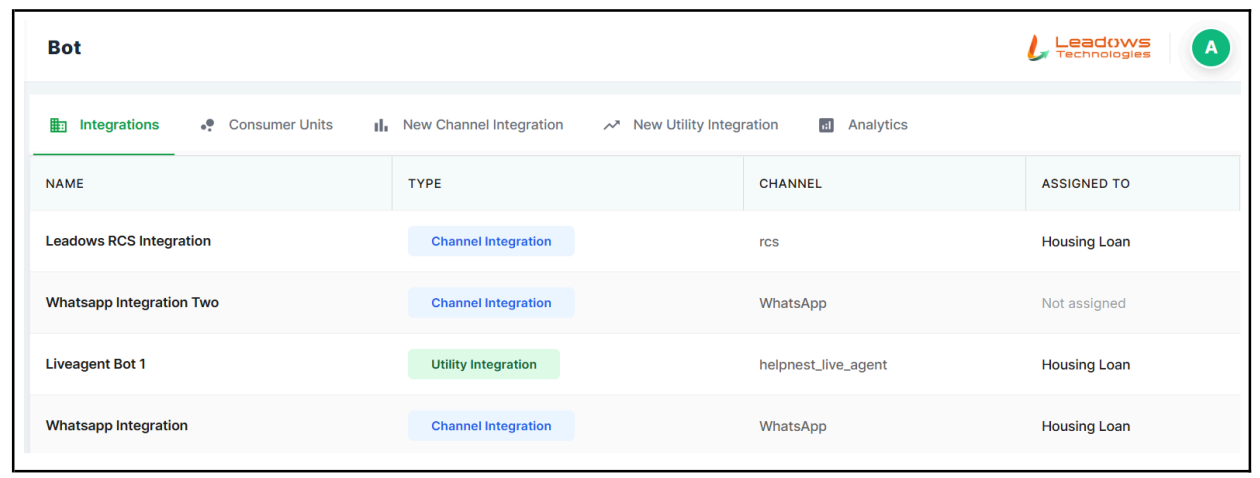
6.4.3.1.3 Bot Channel
The Bots tab within the RCS module displays all RCS bots created under the organization. Organization Owners can view bot details, check verification and launch status, add new bots, and apply filters for easier management.
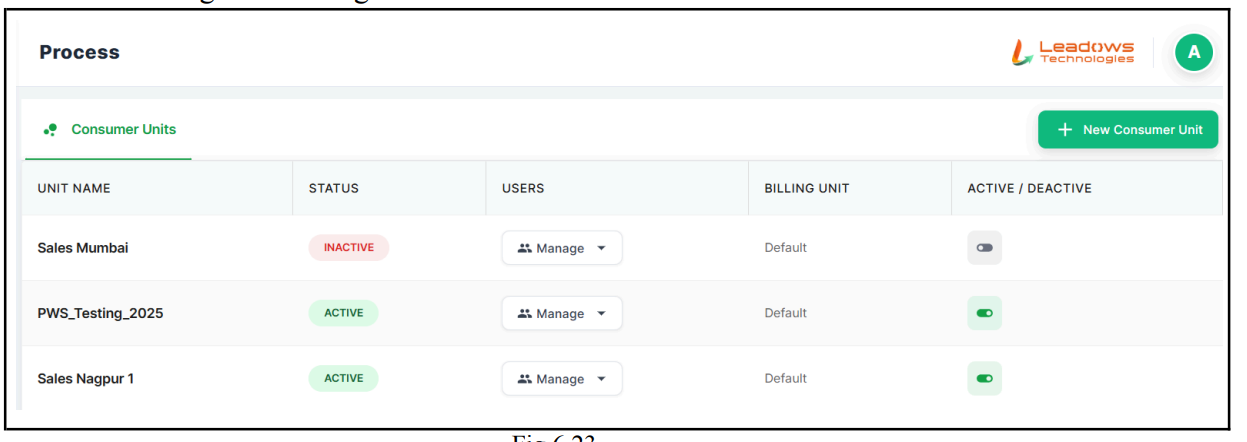
6.4.3.1.4 Process Module
The Process module in the 1SPOC Organization Panel allows Organization Owners to manage Consumer Units that are responsible for handling process workflows.
Status of each unit can be checked if it is activated/deactivated, assigned users, and linked to a designated billing unit.
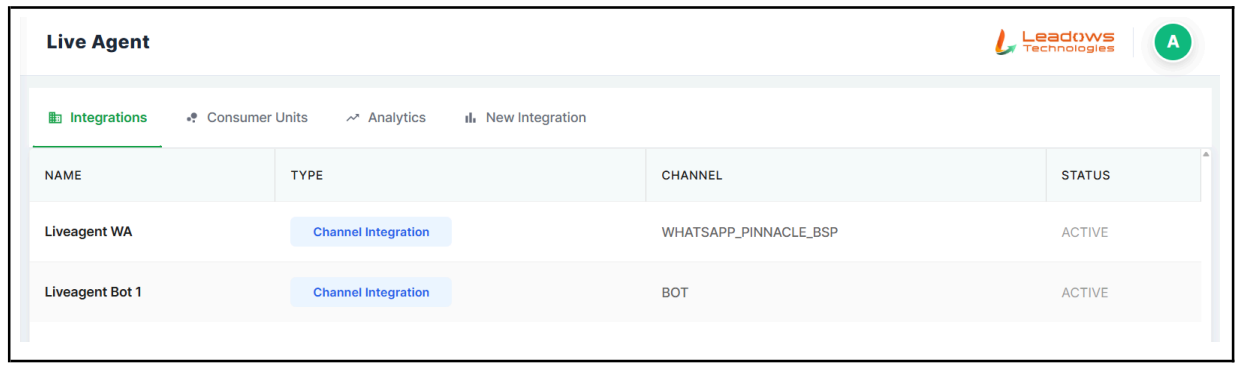
6.4.3.1.5 Live Agent Module
The Live Agent module allows organization owners to manage communication channels such as WhatsApp and Bot integrations, monitor their activation status, review assigned team members, and associate them with designated Consumer Units.
Through the Consumer Insight module, Organization Owners can manage Consumer Units responsible for handling customer interactions and track their activation state and user assignments. The Analytics module provides performance insights on live conversations, including interaction volume, response efficiency, and engagement trends.
Additionally, the New Integration module enables the configuration of new communication channels by linking them with specific Consumer Units and activating services as per organizational requirements.
6.4.3.1.6 Ads Manager
The Ads Manager in the 1SPOC Organization Panel allows Organization Owners to manage WhatsApp Business Accounts (WABAs) associated with advertising operations, providing visibility into details such as account ID, currency, and linked workspace.
The Consumer Insights (Consumer Units) section enables monitoring of units assigned to manage customer enquiries generated through ads, along with their activation status and associated users.
Through the Analytics module, performance metrics related to ad-driven interactions, such as engagement rate, conversion effectiveness, and campaign communication trends, can be evaluated.
Additionally, the New Ads Account (New Integration) option allows owners to configure and onboard new WABAs for campaign tracking and activation based on organizational needs.

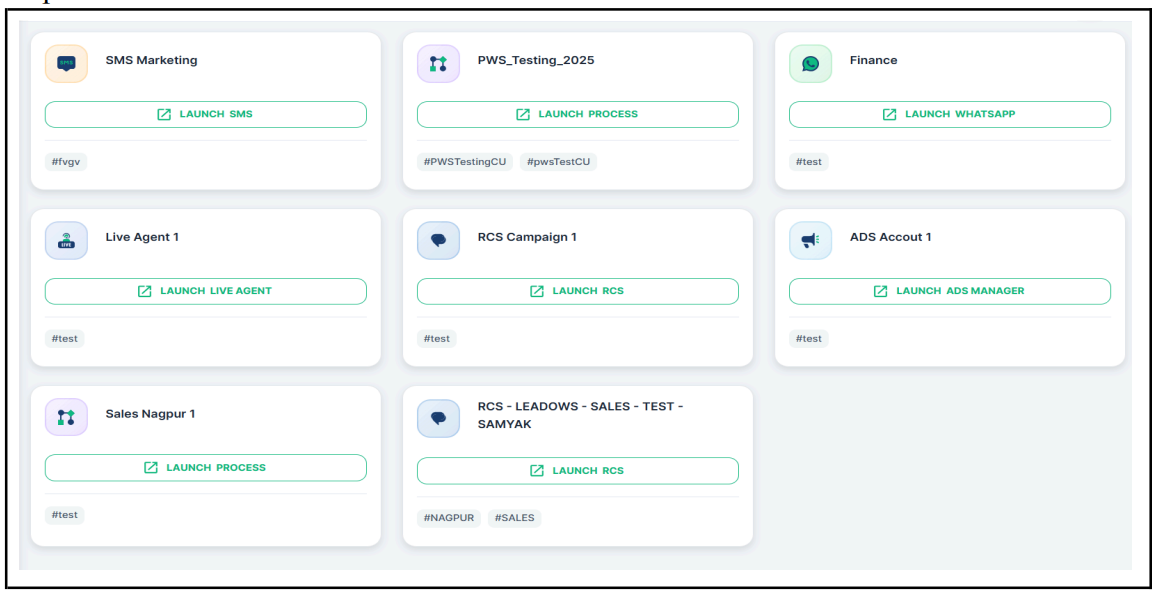
User-Level Dashboard
In the Users Platform module, all communication platforms assigned to the user are displayed once the tab is launched.
This view allows users to access their permitted communication channels directly from the dashboard.
Upon selecting a platform, the system automatically redirects the user to the corresponding communication interface, ensuring a seamless and centralized access experience.
6.5. Technical Support & Documentation
For detailed technical documentation, API integration guides, and platform support, contact your Pinnacle Account Manager or visit the Pinnacle Support Portal.